What’s in your Water?
Greetings, fellow homebrewers! As we wander deeper into the science and art of homebrewing, it’s time to focus on an ingredient that absolutely affects every beverage we make .. beer, mead, cider, kombucha, sake, and coffee. It’s water. (Water has less influence on winemaking, but we’ll talk about that too!)
The goal here is to go beyond just knowing the components of a water profile, to actually understanding the “how” and “why” behind each element. By the end, I hope we’ll know how to tailor our water for that perfect ale, lager, mead, or cider.
Unveiling the Water Profile
Acidity: pH
 pH doesn’t directly come from a mineral but is influenced by the water’s overall mineral content. It affects enzyme activity in the mash and yeast performance during fermentation (see our fermentation blog here). Too low and enzymes can’t function well; too high and you risk extracting unwanted flavors from grains.
If you need to adjust pH, use food-grade phosphoric or lactic acid to lower the pH, or calcium carbonate to raise it. To lower the pH, you can also use acidulated malt, which is malt that has been fermented by its resident bacteria after kilning to create lactic acid (see our post about Lactobacillus here).
Target pH values look like this:
- Ales: 5.2-5.5
- Lagers: 5.3-5.6
- Mead: 3.7-4.6
- Cider: 3.3-3.6
Alkalinity: The Buffer Zone
Alkalinity is the water’s ability to resist changes to pH. Alkalinity mostly comes from calcium carbonate and sometimes magnesium carbonate in the water source. High alkalinity can lead to a soapy taste and can interfere with yeast performance. Using acidulated malt or food-grade acids can be used to reduce alkalinity.
Target alkalinity values look like this:
- Ales: 50-150 ppm
- Lagers: 50-150 ppm
- Mead: 0-50 ppm
- Cider: 0-50 ppm
Sulfate: The Bitter Factor
Sulfates enhance hop bitterness and dryness. They are often derived from gypsum (calcium sulfate). High levels of sulfates can result in astringency.
Target sulfate levels look like this:
- Ales: 150-350 ppm (IPAs are usually over 200)
- Lagers: 50-150 ppm
- Mead & Cider: 0-50 ppm
Chloride: The Sweet Spot
Chlorides elevate malt sweetness and fullness. They typically come from calcium chloride or sodium chloride (table salt). Excessive amounts can make your brew salty.
Target chloride levels look like this:
- Ales: 50-150 ppm
- Lagers: 50-100 ppm
- Mead & Cider: 0-50 ppm
Calcium: The Enzyme Helper
Calcium helps with enzyme activity, yeast health, and protein coagulation. Calcium content mostly comes from calcium sulfate (gypsum) or calcium chloride. High levels of calcium can lead to a chalky taste.
Target calcium levels look like:
- Ales & Lagers: 50-150 ppm
- Mead & Cider: 0-50 ppm
Magnesium: The Yeast Energizer
Magnesium aids in yeast metabolism, but too much can add bitterness and a laxative effect. The most common source of magnesium in homebrew is Epsom salt (magnesium sulfate).
A target amount of magnesium looks like this:
- Ales & Lagers: 10-30 ppm
- Mead & Cider: 0-10 ppm
Sodium: The Flavor Enhancer
Sodium enhances sweetness and mouthfeel but can make your brew salty if excessive. Sodium mostly comes from baking soda (sodium bicarbonate) or table salt (sodium chloride).
A target profile for sodium is:
- Ales & Lagers: 25-75 ppm
- Mead & Cider: 0-25 ppm
Sulfate-to-Chloride Ratio: Finding the Balance
The ratio of sulfate to chloride is very important, especially in beer. A higher ratio of sulfate:chloride (greater than 2:1) accentuates hop character and dryness and is ideal for IPAs. A lower sulfate:chloride ratio (less than 1:1) promotes malty sweetness, great for stouts and porters.
Got it … Now What?
Water isn’t just H2O; it’s a complex player on your team that can drastically impact your homebrew. So how do you actually measure these water components? Thankfully, there are methods for both beginners and seasoned brewers.
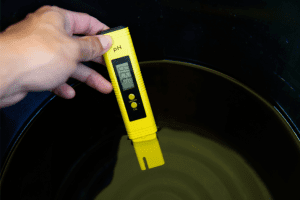
Measuring pH: Get It Right with a Meter
The most accurate way to measure pH is using a digital pH meter. Calibrate the meter first using buffer solutions, usually pH 4.0 and 7.0. Dip the probe into your water sample and get instant readings. Make sure to clean the meter’s probe before and after each use.
Tip: It’s useful to measure the pH at various stages – mash, boil, and fermentation – to make necessary adjustments.
Alkalinity: Titration Kits
Alkalinity is usually determined using a titration kit (see Advanced Kits, below). You add a reagent to a water sample and then add an indicator solution that changes color based on the alkalinity level. Some kits have a color chart to compare against, while others come with a titrant that you’ll add drop by drop until the color changes, allowing you to calculate the alkalinity in ppm.
Mineral Content: Test Strips or Advanced Kits
Test Strips: A quick and easy way to get a ballpark estimate of mineral content. Dip the strip in your water and compare the color change to a chart. Keep in mind that these aren’t very precise, and they have an expiration date.
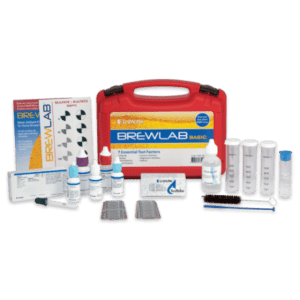
Advanced Kits: These water test kits (like this one) can measure specific ions like sulfate, chloride, calcium, magnesium, and sodium. These kits often use a method similar to titration or a more advanced colorimetric method, and they offer higher accuracy. As an alternative to buying a test kit at our store, you might also send a water sample to your local water district or a full-service lab for a comprehensive analysis.
The Trusty Local Water Report
Your local water report can also provide a lot of this information. However, be aware that municipal water can vary throughout the year, and these reports might not include all the brewing-relevant ions.
North Texas Municipal Water District
Water in Wine Brewing
Unlike beer, wine doesn’t contain a large percentage of water since the fruit juice itself forms the base. However, water still plays a crucial role, especially in the preparation phases. For example, water quality can influence the sanitation of equipment and the dilution of juices or concentrates.
For wines, a water profile might look like:
- Reds: 50-100 ppm calcium, less than 50 ppm sulfate and chloride
- Whites: 50-100 ppm calcium, less than 50 ppm sulfate and chloride
- Fruit Wines: Varies widely, but usually follows red and white guidelines
In the case of red wines, you’ll want a balanced water profile to not interfere with the robust, complex flavors. For white wines, the water should be equally balanced but may tolerate slightly higher mineral content, which could add some complexity to the more delicate flavors. It’s a subtler game with wine, but understanding your water can certainly elevate your vintner skills.
Water in Coffee
 Believe it or not, the quality of water you use in coffee brewing is just as important as in any other homebrew. Coffee, like most homebrews, is largely water. In the case of coffee, up to 98% of the beverage. So, the mineral content and quality of your water can dramatically impact the end flavor
For great coffee, a water profile might look like:
- pH: 6.5-7.5 – too acidic or too alkaline water can make your coffee sour or bitter
- Calcium: 50-100ppm, Magnesium: 10-50ppm – these ions help in the extraction of flavor compounds from the coffee grounds
- Sodium: 10-50ppm – Sodium can improve the perceived flavor of the coffee, but too much can make it taste salty
- Chloride: 0-100ppm – Chloride can round out flavors but should be present in moderate amounts to prevent a flat or dull taste
- Sulfates: 0-100ppm – Sulfates can add sharpness but may result in a dry aftertaste if too high.
Reverse Osmosis (RO) and distilled water lack minerals, making the coffee taste flat. You’ll need to remineralize to the numbers above.
If your tap water has the right mineral content and is free of contaminants, it can be an excellent base for your coffee. Be sure to test and filter it as necessary.
Another Lever to Customize Your Homebrew
Accurate measurements are your gateway to becoming a master homebrewer. Now that you’re armed with the knowledge of what your water profile is and how to measure it, how are you planning to tweak your water to make that brew different, or better, or more like the commercial version? Please share your experiences and ideas in the response area below and let’s all learn from each other.
Happy Homebrewing!