 A Beginner’s Guide to Brewing Beer
Have you ever wondered how to homebrew beer? Brewing beer is like cooking up a tasty, fizzy science experiment. It’s a mix of creativity and chemistry .. but don’t worry, it’s not as complicated as it sounds!
At its core, brewing is a simple process with just a few key steps. Here’s a quick overview how to homebrew beer:
- Build a Recipe: This is where you choose your ingredients, like grains (usually malted barley), hops, yeast, and water, depending on the type of beer you want to make.
- Mash the Grains: You steep the crushed grains in hot water to extract sugars. This is the “mash,” and the goal is to create a sweet, grainy liquid called wort.
- Boil the Wort: You bring the wort to a boil and add hops. Hops give beer its bitterness and flavor and aroma while helping preserve it.
- Cool the Wort: After boiling, you need to cool the wort down quickly so it’s ready for yeast.
- Ferment: The wort goes into a fermenter and yeast is added. The yeast eats the sugars and turns them into alcohol and carbon dioxide. This is where beer magic happens!
- Package: Once fermentation is done, you bottle or keg the beer. If you’re bottling, you add a bit more sugar to carbonate the beer (so it gets fizzy). If you’re kegging, you force-carbonate it with CO2.
A Closer Look at How to Make Beer
Now, if you want to dive a little deeper into each step and try brewing beer yourself, here’s a more detailed guide to help you out. Grab your ingredients and equipment from North Texas Homebrew, and let’s make some beer!
1. Build a Recipe
Every beer starts with a recipe. This is where you decide what kind of beer you want to make .. an IPA, a stout, a lager? You’ll need four basic ingredients:
- Grains (usually malted barley): These are what give the beer its body, color, and flavor, and some of them have desirable sugars inside.
- Hops: Hops add bitterness to balance the sweetness of the grains and give aroma and flavor.
- Yeast: Yeast is what turns the sugars from the grains into alcohol.
- Water: The foundation of any good beer.
Some recipes might include extra flavors like fruits, spices, or different types of sugars. It’s like putting together a cake recipe—you need to know the style you’re aiming for!
 2. Mash the Grains
The grains get crushed up to expose their starchy insides. Then you soak the crushed grains in hot water (around 150-160°F or 65-70°C) for about an hour. This is called mashing, and the goal is to help enzymes convert the starches into sugars, which yeast will later eat to make alcohol. The end result is a sugary liquid called wort. You’ll drain this wort from the grains and move on to the next step.
3. Boil the Wort
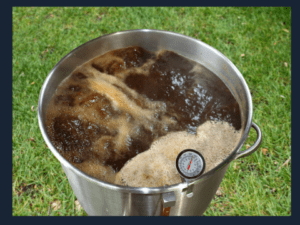
Now you bring the wort to a rolling boil for about an hour. You add hops at different times during the boil to achieve various flavors and bitterness levels. Some hops are added early for bitterness, while others go in later to add aroma and flavor. The boil also helps sanitize the wort, killing off any unwanted bacteria or wild yeast. It also helps boil off undesirable chemicals that could cause off-flavors. Once the boil is done, you’ve got yourself a flavored, sanitized liquid
that’s ready for fermentation.
4. Cool the Wort
After boiling, it’s important to cool the wort quickly. You don’t want to pitch yeast (add yeast) into hot wort because yeast is a living organism, and high temperatures could kill it. And you don’t want to take too long to cool it down because there’s a chance that bacteria could get to the sugar before the yeast does! Time is of the essence. A simple way to cool wort is by putting your kettle in an ice bath, or if you’re serious about brewing, you can use a wort chiller. You’ll want the wort to get down to around 65-70°F (18-21°C) for most ales, or cooler for lagers.
5. Ferment
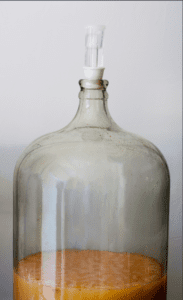
This is where the magic of brewing happens! Pour the cooled wort into a sanitized fermenter, then add your yeast. The yeast will eat the sugars in the wort and turn them into alcohol and carbon dioxide. Depending on the type of beer you’re brewing, fermentation can take anywhere from one to two weeks (sometimes longer for certain styles). The yeast will also develop some of the beer’s flavors during this time. Once the yeast is done working, it’ll settle to the bottom of the fermenter, and your beer will be ready for the next step.
6. Package the Beer
You’re almost there! The beer needs to be packaged, and this
can be done either by bottling or kegging. If you’re bottling, you’ll mix in a small amount of sugar (called priming sugar) before capping the bottles. The leftover yeast in the beer will eat this sugar and produce carbon dioxide, which carbonates your beer naturally. Let the bottles sit for another week or two, and voilà—you’ve made your own beer! If you’re kegging, you can force carbonate the beer by adding CO2 directly for a day or two, then turn the CO2 down to serving pressure.
Wrapping It Up
And that’s it—you’ve just learned how to make beer! It’s a process that involves both science and creativity, and once you get the hang of it, you can start experimenting with different recipes and techniques. Whether you’re brewing for fun or aiming to perfect your craft, the journey of making beer is always rewarding.
So, gather your ingredients, fire up the kettle, and start brewing!
Share your brewing experiences on Facebook or Instagram .. use the tag #northtexashomebrewed


 2. Mash the Grains

